

Few short treks anywhere in the world pack in as many photographs as Mardi Himal. In four or five days you pass through terraced farmland, dense rhododendron forest, a cloud-wrapped ridge and an alpine viewpoint beneath some of the most striking peaks in the Himalaya. Machapuchare, the Fishtail mountain, dominates the northern skyline for much of the route, and its shape changes from every angle.
This guide is for photographers of every level, from smartphone users to those carrying a full camera kit. It covers the best photo spots on the route, the times of day to be there, practical settings, gear, how to deal with cold and dust, and how to photograph people respectfully.
Why Mardi Himal Is So Photogenic
The trek follows a ridge rather than a valley, so once you are above the forest there is very little between you and the mountains. The route runs almost directly toward Machapuchare, giving you a changing but always prominent subject. Clouds frequently fill the valleys below the ridge, creating a sea of clouds with peaks floating above it. And the short distance means you can plan your days around the best light without long walking days getting in the way.
The Best Photo Spots on the Route
Australian Camp
The first big viewpoint of the trek, reached within a couple of hours of Kande. On clear mornings you get a wide panorama of the Annapurna range above a green meadow, often with prayer flags or lodges in the foreground. It is best early in the day before haze builds from the valley.
The Rhododendron Forest
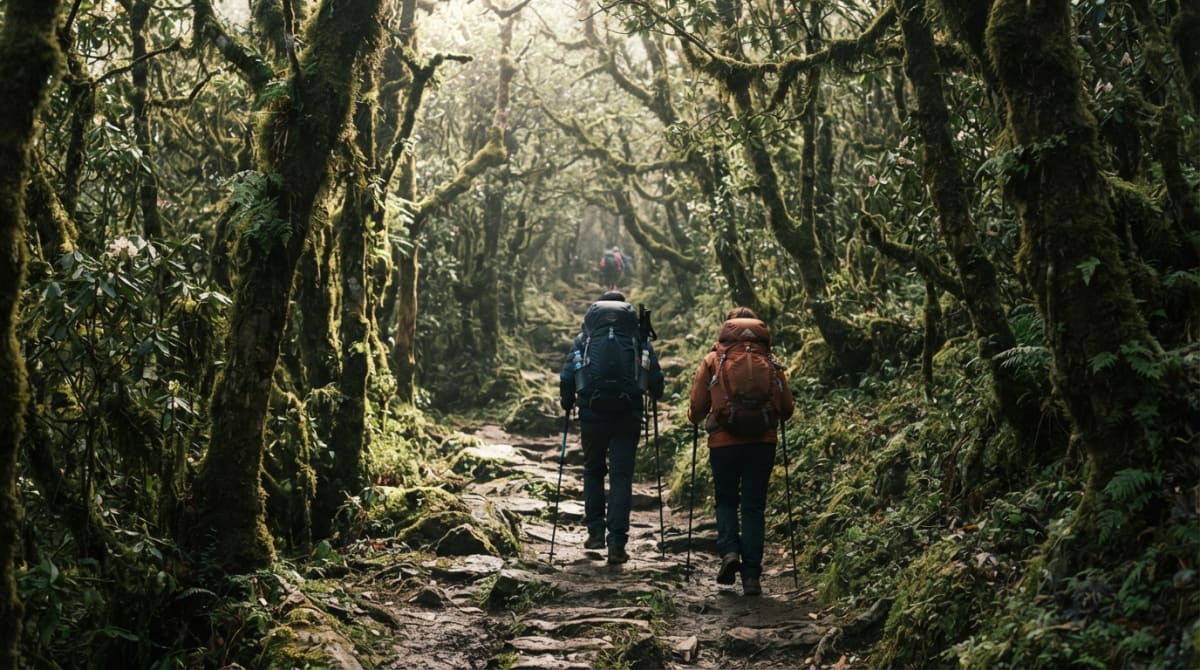
Between Pitam Deurali and Low Camp, the forest itself is the subject. In March and April the rhododendrons bloom in red, pink and white. At other times, look for moss-covered branches, shafts of light through mist, and the texture of the trail. A wide lens and patience with the light work well here. Our guide to the rhododendron forest section describes the best stretches.
Low Camp at Sunset
Low Camp is the first place where Machapuchare stands directly in front of you, and in clear weather the last light turns its summit orange and pink. Set up a few minutes before sunset and keep shooting after the sun drops, as the colours often peak later. Read about sunset at Low Camp and Badal Danda.
Badal Danda and the Cloud Line
Badal Danda means "cloud hill", and it often sits right at the level where clouds rise from the valleys. When the cloud is below you, you can capture peaks rising above a white sea. When it swirls around you, look for silhouettes of trekkers and trees in the mist.
The Ridge to High Camp
The narrow ridge between Badal Danda and High Camp offers leading lines with the trail winding toward the mountains, and trekkers for scale against the vast backdrop. Shoot from slightly above or below the trail to show the drop on either side.
High Camp at Dawn and Dusk
High Camp gives close views of Machapuchare, Mardi Himal and the peaks to the west. Sunrise from the lodges is lovely, but many photographers save their energy for the Upper View Point. Evening light can be spectacular too. See the sunrise guide to High Camp.
The Upper View Point
At around 4,200 meters, this is the most popular sunrise spot on the trek. As the first light hits Annapurna South and Hiunchuli, then moves across to Machapuchare, you get a sequence of changing colour that lasts about 20 minutes. Arrive before sunrise and be ready early.
Mardi Himal Base Camp
From Base Camp the mountains feel close enough to touch. Machapuchare towers above, the Mardi Himal face rises directly ahead, and the Annapurna South massif fills the western view. Morning light is usually best, before clouds build. Read our Base Camp visitor's guide.
Siding and Village Life
On the descent, the villages around Siding offer terraced fields, stone houses, livestock and daily life. The light is softer lower down, and the human element adds variety to your collection.
Timing: When the Light Is Best
| Time | Where | What to expect |
|---|---|---|
| Sunrise | Upper View Point, Base Camp, High Camp | Alpenglow on peaks, clear air |
| Early morning | Australian Camp, ridge walks | Clear views before haze and cloud |
| Midday | Forest sections | Harsh light on peaks; better for shaded forest |
| Late afternoon | Low Camp, Badal Danda | Clouds lifting, warm light |
| Sunset and blue hour | Low Camp, High Camp | Pink and orange peaks, then soft blue tones |
| Night | High Camp | Stars and the Milky Way on clear, moonless nights |
In most seasons, mornings are clearer than afternoons, and clouds build from late morning. Plan your key shots early in the day. Read golden hour and blue hour on Mardi Himal for more.
Choosing the Best Season for Photography
- October and November: the clearest skies and sharpest mountain views. The best choice for classic peak photos.
- December to February: snow on the peaks and sometimes on the ridge, very clear air, and few trekkers. Cold for early starts.
- March and April: rhododendron blooms and green hills, with more haze and afternoon cloud.
- May: warm, hazy, with building pre-monsoon clouds.
- June to August: dramatic clouds and lush forest, but clear mountain views are rare.
See the best month for photography on Mardi Himal.
Camera Gear
Weight matters on a steep trek, so take what you will actually use. A practical kit might include:
- A mirrorless or compact camera, or a good smartphone
- A wide-to-standard zoom, around 16–35 mm or 24–70 mm full-frame equivalent
- A telephoto zoom, around 70–200 mm, for compressing peaks and picking out details
- Spare batteries, at least two
- Plenty of memory cards
- A lightweight tripod if you want sunrise panoramas, star photos or timelapses
- A lens cloth and a rain cover
Our camera gear guide explains the trade-offs, and phone photography on Mardi Himal covers smartphone techniques.
Settings and Techniques
- Exposure: snow and bright sky can fool your meter into underexposing. Check your histogram and add a little exposure compensation when needed.
- Sunrise: bracket exposures or use your phone's HDR mode to capture both bright peaks and dark foregrounds.
- Composition: use the trail, prayer flags or trekkers to lead the eye toward the mountains. Include people for scale.
- Telephoto: use a long lens to isolate the summit of Machapuchare or the ridge lines of Annapurna South.
- Panoramas: the ridge offers wide views; shoot overlapping frames in portrait orientation for stitching.
- Stars: on clear, moonless nights at High Camp, use a tripod, a wide aperture and exposures of around 15 to 25 seconds. See stargazing and Milky Way photography.
Protecting Your Gear in the Cold
Cold is the biggest threat to your photography on Mardi Himal. Batteries lose capacity quickly below freezing, so keep spares in an inside pocket and sleep with them in your sleeping bag. When you come into a warm dining room from the cold, condensation can form on lenses; put your camera in a sealed bag before entering and let it warm slowly. Charging is limited and costs extra at higher lodges, so a power bank helps. Read power banks and charging gear.
Dust, Rain and Wind
The lower trail can be dusty in spring, and wind on the ridge blows grit into lens joints. Change lenses away from the wind, carry a blower, and use a rain cover or plastic bag in wet weather. In the monsoon, keep silica gel packs in your camera bag to absorb moisture.
Photographing Machapuchare
Machapuchare is the star of the trek. From Low Camp and the lower ridge, you see its classic pyramid shape. From High Camp and Base Camp, its twin summit, the "fishtail", becomes visible from certain angles. Try photographing it at different times of day and from different points along the ridge to show how its shape changes. Our dedicated guide on how to photograph Machapuchare goes into detail.
Photographing People
Local people, porters and fellow trekkers add life to your photos. Always ask before photographing someone. A smile and a gesture toward your camera usually works, and most people are happy to be photographed. Respect a refusal. Avoid photographing religious ceremonies without permission and never pay children for photos. Read photographing people respectfully.
A Photographer's Day at High Camp
To see how the best shots come together, picture a clear autumn day spent around High Camp. You arrive from Low Camp around midday, when the light is flat, so you rest, eat and scout compositions along the ridge behind the lodges. Mid-afternoon, clouds often rise from the valleys; this is the time for moody shots of the ridge and lodges in the mist. Toward sunset the clouds usually settle, and you photograph the last light on Machapuchare from a spot you picked earlier.
After dinner, if the sky is clear and the moon has not risen, you step outside with a tripod for the stars. Then it is an early night, because the alarm goes off around 4 a.m. You climb by headlamp toward the Upper View Point, arriving 20 to 30 minutes before sunrise to set up. You shoot the dawn sequence, continue to Base Camp for close-ups while the air is still clear, and descend in bright morning light, photographing trekkers on the ridge with the mountains behind them. By the time clouds build again, you are back at High Camp for breakfast with a full memory card.
Photographing in Poor Weather
Not every day on Mardi Himal is clear, and some of the most memorable photos come from imperfect conditions. Mist in the forest makes for atmospheric, layered images. Clouds breaking around a summit for a few seconds can produce more striking shots than a cloudless sky. Light snow on the ridge adds texture and mood. When the weather is poor, switch your attention from the big panoramas to details: water droplets on moss, prayer flags in the wind, trekkers' silhouettes in fog. Keep your camera ready, because breaks in the cloud often last only moments. Our guide to the sea of clouds on Mardi Himal explains when these conditions are most likely.
Backing Up and Editing on the Trail
Losing a memory card on the trek would be painful, so build a simple backup routine. Carry several smaller cards rather than one large one, and swap cards each day so a single failure never costs you the whole trek. If you have a phone and your camera supports wireless transfer, copy your favourite shots to your phone each evening. Wi-Fi at the tea houses is too slow and unreliable for cloud uploads of large files, so wait until you are back in Pokhara for that. Resist deleting photos on the small screen in the cold; you may be surprised what looks good later on a larger display. Evening editing on a phone is a pleasant way to relive the day, but keep your battery use in mind.
Drones
Flying a drone in Nepal requires permission from the authorities, and conservation areas have additional rules. Unauthorised drones can be confiscated. If you want aerial footage, arrange permission well in advance through a local agency, or leave the drone at home. See drone rules on the Mardi Himal Trek.
Planning Your Itinerary Around Photography
If photography is your main goal, choose an itinerary with extra time on the ridge. An extra night at High Camp or Badal Danda gives you a second chance at sunrise if the first morning is cloudy. Our photography itinerary shows how to plan days around the best light.
Photograph Mardi Himal with Us
Our guides know the viewpoints, the timing and the weather patterns that make the difference between a good photo and a great one. They are happy to schedule early starts, wait for the light and suggest angles. The 5-day Mardi Himal Trek from Pokhara gives you nights at Low Camp and High Camp, the two best places for sunset and sunrise. If you want extra time on the ridge, the 9-day Mardi Himal Trek can be adapted. Contact us to plan a photography-focused trip.