

For most trekkers, the Mardi Himal itinerary is about distances and altitude. For photographers, it is about light. The same view of Machapuchare can be flat and hazy at midday and breathtaking at dawn, and a sea of clouds below Badal Danda can appear for only a few minutes at sunset. Standard itineraries often put you on the trail during the best light and in your lodge during the worst. A photography itinerary does the opposite: it places you at the right viewpoints at the right time, with extra nights on the ridge to give you multiple chances at the shots you came for.
This guide sets out a photography-focused itinerary, explains the key light windows at each location, and offers practical tips for photographers on the trek. It is typically arranged as a private trek, adapted from our 5-day Mardi Himal Trek from Pokhara.
A Sample 7-Day Photography Itinerary
| Day | Route and light plan | Overnight |
|---|---|---|
| 1 | Kande to Australian Camp; sunset over the Annapurna range | Australian Camp |
| 2 | Sunrise at Australian Camp, walk to Forest Camp; forest light in the afternoon | Forest Camp |
| 3 | Forest Camp to Low Camp; sunset on Machapuchare | Low Camp |
| 4 | Sunrise at Low Camp, walk to Badal Danda; clouds and sunset | Badal Danda |
| 5 | Sunrise ridge shots, walk to High Camp; evening light and stars | High Camp |
| 6 | Sunrise at the Upper View Point and Base Camp; second night at High Camp | High Camp |
| 7 | Second sunrise attempt, descend to Siding and Pokhara | Pokhara |
Key Light Windows
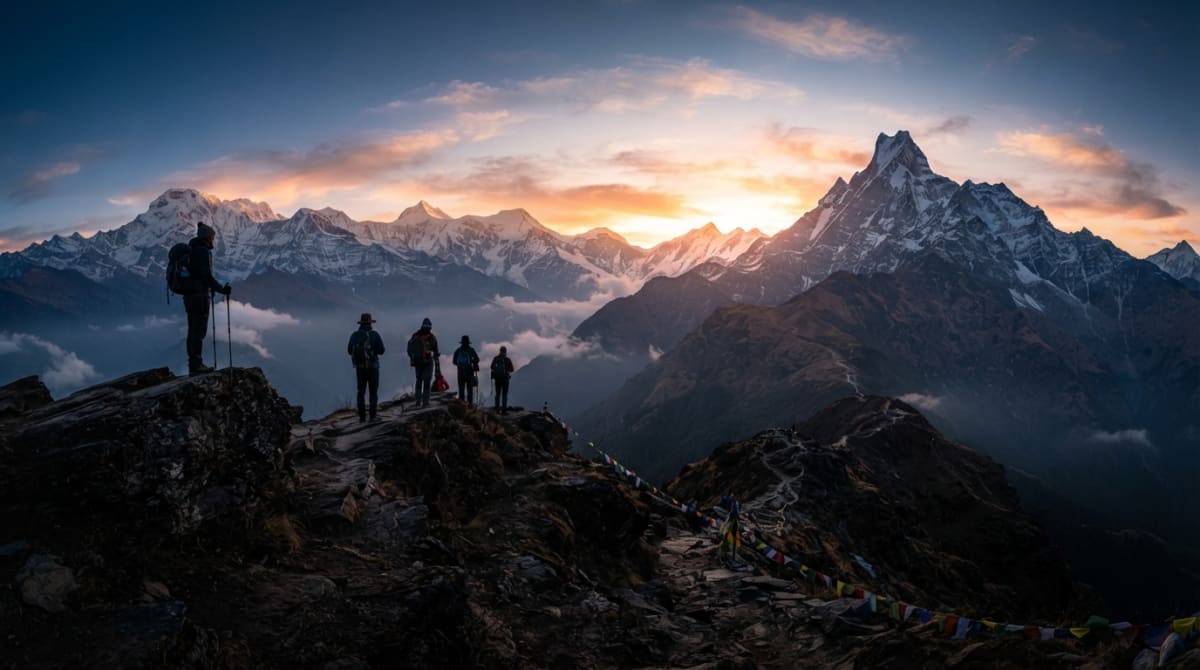
Australian Camp offers the first wide panorama of the Annapurnas, best at sunrise and sunset. Forest Camp and the forest section are best in soft, misty light, especially in spring with rhododendrons. Low Camp is the classic sunset location, with Machapuchare directly ahead. Badal Danda often sits at the cloud line, perfect for sea-of-clouds compositions at dawn and dusk. High Camp offers close-up peaks at sunrise and sunset and clear skies for star photography. The Upper View Point and Base Camp deliver the most dramatic sunrise sequence of the trek. See our photography guide.
Why Two Nights at High Camp?
The single most important choice in a photography itinerary is spending two nights at High Camp. It gives you two chances at the Base Camp sunrise, protects you against a cloudy morning and lets you shoot the ridge in different conditions. It also improves acclimatization, making the pre-dawn climb with heavy camera gear easier. See our High Camp guide.
Composition Ideas at Each Stop
At Australian Camp, use the meadow, lodges or prayer flags as foreground against the long line of peaks. In the forest, look for layers of mist between trunks, shafts of light through the canopy, and close-ups of moss, ferns and rhododendron blossoms. At Low Camp, frame Machapuchare between trees or above the lodge roofs as it glows at sunset. At Badal Danda, shoot the ridge and peaks rising above a sea of cloud, with trekkers as tiny figures for scale. On the ridge to High Camp, use the winding trail as a leading line toward the mountains. At High Camp, capture the lodges beneath the peaks at dusk and the stars at night. At the Upper View Point and Base Camp, use a telephoto to compress the ridges of Annapurna South and Hiunchuli, and a wide lens for the full sunrise sequence.
Choosing the Season
Each season offers different photographic opportunities. October and November bring the clearest air, deep blue skies and sharp mountain detail, ideal for classic peak photography, though popular viewpoints can be busy. December to February bring heavy snow on the peaks, crisp air and few trekkers, but extreme cold at dawn. March and April bring rhododendron blooms, green hills and softer, hazier light, with excellent forest photography. The monsoon offers dramatic clouds, lush greenery and wildflowers, with fleeting views of the peaks. Choose based on the images you want to create. See the best month for photography.
Gear for a Photography Trek
Balance image quality against weight. A mirrorless camera with a wide-to-standard zoom and a telephoto zoom covers most needs. A lightweight travel tripod is valuable for sunrise panoramas, long exposures and stars. Bring several spare batteries, as cold drains them fast, and plenty of memory cards. A polarising filter helps with skies and haze, and a lens cloth and blower keep dust and moisture off your lenses. Pack everything in a protective, weather-resistant bag. See camera gear for the trek.
Hire a Porter for Your Gear
Camera gear adds significant weight. Hiring a porter to carry your main bag lets you carry your camera kit in your daypack without exhausting yourself on the climbs. This is especially important on the pre-dawn hike, when you need energy to reach the viewpoint and hands free for your camera. Pack carefully so fragile equipment stays with you rather than in the porter's load.
Night Photography at High Camp
On clear, moonless nights, High Camp offers excellent opportunities for star and Milky Way photography, with the silhouettes of Machapuchare and Mardi Himal against a sky full of stars. Use a tripod, a wide lens with a large aperture, and exposures of around 15 to 25 seconds. Scout compositions in daylight. Dress very warmly, as nights are cold, and keep spare batteries in an inside pocket. Plan your trek around the new moon if stars are a priority. See stargazing and Milky Way photography and timing around the lunar cycle.
Clouds and Weather as Subjects
Do not despair if the weather is not perfect. Some of the best Mardi Himal images come from dramatic conditions: peaks emerging from swirling cloud, fog drifting through the forest, the sea of clouds below Badal Danda at sunset, or fresh snow dusting the ridge. Stay alert and keep your camera ready, as these moments are often brief. A second night at High Camp and a flexible itinerary increase your chances of capturing them. See the sea of clouds on Mardi Himal.
Working with Your Guide
A good guide is a photographer's ally. Tell your guide about your goals at the start, so they can plan early starts, suggest viewpoints and allow time for waiting on light. Guides know the ridge well, including the best spots for sunrise and sunset and how the weather tends to develop through the day. They can also help with people photography, explaining to locals what you are doing and asking permission.
Battery and Data Management
Cold, limited charging and remote locations make power and storage key concerns. Carry enough batteries for several days without charging, as electricity at High Camp can be limited. Keep batteries warm in inside pockets and in your sleeping bag at night. Bring a power bank for your phone. Use multiple memory cards rather than one large card, and back up your best images to your phone or a portable drive each evening. See power banks and charging gear.
Photographing People
People add life and scale to trekking photos. Photograph fellow trekkers on the ridge, guides and porters at work, and village life around Kande and Siding, always asking permission first. Respect a refusal, avoid intrusive photography during religious ceremonies, and never pay children for photos. See photographing people respectfully.
Drones
Drone photography requires permission from Nepali authorities and is subject to rules in conservation areas. Unauthorised drones can be confiscated. Arrange permission well in advance or leave the drone at home. See drone rules on the Mardi Himal Trek.
A Photographer's Daily Rhythm
On a photography itinerary, your daily rhythm is built around light. Wake before sunrise and head to the nearest viewpoint with your camera, tripod and warm layers. Shoot the sunrise sequence, then return to the lodge for breakfast as the light becomes harsher. Walk to the next stop during the middle of the day, when the light is least interesting for landscapes, photographing details along the way. Arrive in the early afternoon, rest, back up your images and scout compositions for the evening. Shoot the sunset and blue hour, then return for dinner. On clear nights, head out again for stars. This rhythm means shorter walking days but much more time behind the camera, which is why a photography itinerary takes longer than a standard trek.
Shooting the Forest
The forest between Pitam Deurali and Low Camp is one of the most photogenic sections of the trek, but it requires a different approach from mountain photography. The canopy blocks direct sun, so soft, even light is common, especially on misty days, which is ideal for capturing detail and colour. Look for layers of trees receding into mist, twisted moss-covered trunks, rhododendron blossoms in spring, and the trail winding through the woods. A wide-angle lens captures the sense of depth, while a macro or close-focusing lens reveals ferns, mosses and flowers. Spending a night at Forest Camp gives you time to photograph the forest in both morning and evening light. See the rhododendron forest section.
Timing Sunrise Correctly
Sunrise times change through the year, and the peaks catch the first light before the sun reaches your position. In autumn, sunrise is roughly between 6 and 6:30 a.m.; in winter, closer to 6:30 or 7; in spring and early summer, earlier, around 5:15 to 6. Leave High Camp early enough to reach the Upper View Point 20 to 30 minutes before sunrise, allowing time to set up in the dark. The best colour often appears just before and just after the sun rises, so be ready early and keep shooting after the first light. See sunrise and sunset times by season.
Protecting Your Gear in the Mountains
The Mardi Himal environment is tough on camera equipment. In the cold at High Camp and on the pre-dawn hike, batteries drain quickly and lenses can fog when you move between cold air and a warm dining room. Keep spare batteries warm, and let your camera warm up slowly in a sealed bag before opening it indoors. In spring, dust on the lower trail and roads can get into lens mounts, so change lenses carefully and away from the wind. In the monsoon, rain and humidity threaten electronics; use a rain cover and keep silica gel in your bag. A padded, weather-resistant bag that fits in your daypack protects your kit on the trail.
Beyond the Big Views
The grand mountain panoramas are the headline shots, but a strong photo story of Mardi Himal includes much more. Capture the details of tea house life: steaming cups of tea, boots drying by the stove, prayer flags against the sky. Photograph the changing landscapes from terraced fields near Kande to mossy forest and open ridge. Include your fellow trekkers, guide and porter at work and at rest. These smaller images, combined with the big views, tell the full story of your journey and often become the photographs people remember most.
Adapting the Itinerary on the Trail
Even a carefully planned photography itinerary must adapt to the weather. If a morning at Low Camp is clear and the forecast for the next days is poor, it may be worth pushing on to High Camp early to catch the clear window. If High Camp is clouded in, staying an extra night rather than descending may give you the shot you want. Discuss the forecast with your guide each evening and be willing to rearrange the plan. Flexibility is the photographer's greatest asset in the mountains, and a spare day or two makes all the difference.
Editing on the Trail
Evenings in the tea house are a good time to review and back up your images, but resist the temptation to delete too much on a small screen in the cold. Make quick edits on your phone for sharing later, but save detailed processing for home, where you can judge colours and detail properly. Wi-Fi at higher lodges is too slow for uploading large files, so wait until you are back in Pokhara.
Book a Photography Trek
We arrange private photography-focused treks with guides who understand light and timing. Start with the 5-day trek from Pokhara or the 9-day trek, and contact us to plan your shoot.